Having a complete, tailored, and well-configured artist page on the platforms where your music resides carries numerous benefits. It looks professional, projects an air of success (even if you’re just starting out), and allows you to put out exactly the sort of vibe, aesthetic and small details that are important to you and your musical artistry.
We’ve gone through some of the most popular music platforms, both streaming and retail, to provide a one-stop resource for cultivating artist pages. It’s going to take you a bit of time, but it’s time well spent. We shall update this page from time to time as the processes relating to each platform change or evolve, so it’s worth bookmarking!
Bandcamp
The lowdown: Bandcamp is a music platform for artists to upload albums, EPs and singles, including vinyl and even cassette tapes, along with other physical items such as merchandise. For an artist page, all you need to do is sign up for an account and upload your music, artwork, and any supporting information you want (including bio, social channels etc).
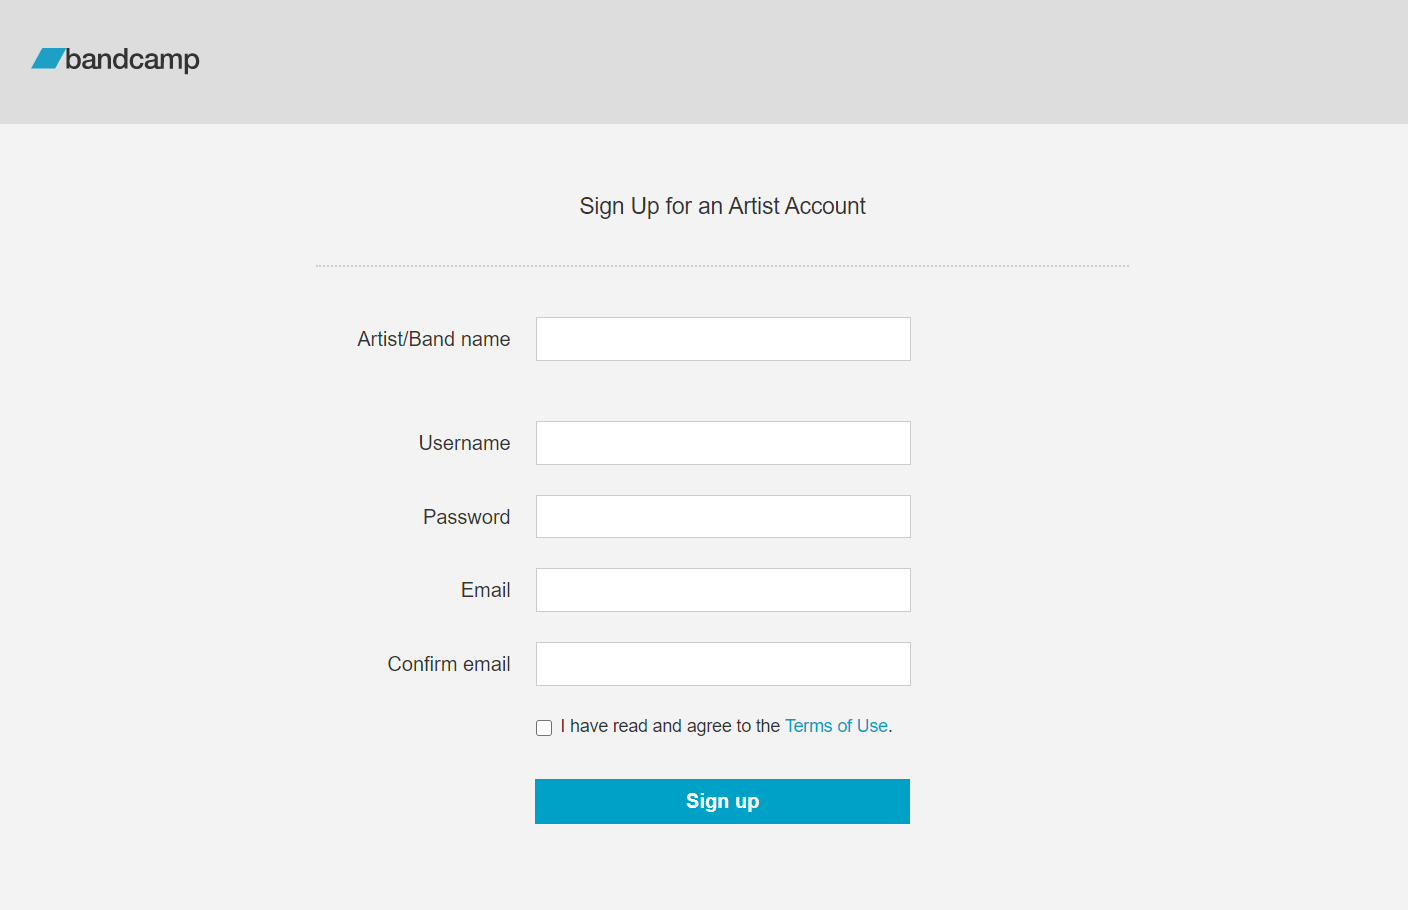
To start, select the sign up found on http://Bandcamp.com and a popup window will appear asking what type of account you wish to open. Select the Sign Up as an Artist button and you’ll be taken to the Bandcamp for Artists page:
Bandcamp allows artist and band name to be as unique as you want them to be. You can include using foreign characters, numbers, emojis- there seems to be few limitations. Just remember though: your artist name should be memorable (and not impossible for people to work out how to type). The good news here is that if you decide having an artist name built from emojis and weird characters was not a fabulous idea after all, Bandcamp allows you to change your artist name in just a few clicks.
After setting your artist name, you will be asked to choose a username (just for logging in), password and email address. NOTE: this need not be the same email as your PayPal account. All you have to do now is read the terms and conditions (yawn. We know. But you should read them), and complete sign-up. You are now officially a Bandcamp artist. But wait! We’re only just getting started.
After taking the plunge, you are met with a few initial questions relating your account set up. You will first be asked about what kind of music you plan on releasing and your geographic location.
Although Bandcamp allows you to use tags to be both super-specific and esoteric in describing your oeuvre, they do require you to select a generic genre as a starting point. This is a good thing; it will help with discoverability and lump you in (positively) with other artists, including really successful ones.
The current top-level genre list:
Acoustic
Alternative
Ambient
Audiobooks
Blues
Classical
Comedy
Country
Devotional
Electronic
Experimental
Folk
Funk
Hip-hop/Rap
Jazz
Kids
Latin
Metal
Podcasts
Pop
Punk
R&B/Soul
Reggae
Rock
Soundtrack
Spoken Word
World
Selecting your generic genre is important as Bandcamp uses it as a way to introduce your music to new listeners. The most basic way for Bandcampers to search for new music is from one of these top-level genres. From there, you can get more granular with the tags for more specific and niche genres. So have a good think about which top-level genre you’re going to select.
In terms of location, you can choose whatever you want if you want to use a location aesthetically and pick one that’s associated with a particular scene or genre. But if you are an artist perhaps looking to build a fanbase and get gigs in your local area, putting your real location will help in this regard!
Like social media channels, Bandcamp lets you set a custom URL for your page so fans can easily find your music. For obvious reasons, we recommend that you use your artist/band name. If your Bandcamp URL is already taken, either change your name (!) or add an appropriate prefix or suffix e.g. ‘band’, ‘the-real’, ‘official’ etc).
Bandcamp is designed to feel like buying something directly from an artist at a show, where a fan gets to connect with someone whose work they love and experience the satisfaction of supporting further creations. So when a fan arrives on your artist page, it’s important that they immediately sense that it’s yours, a place where they’re directly supporting you. Check out the official Bandcamp design tutorial for details on how to customise your little corner of Bandcamp. It’s also important to add an artist image; any image is better than none at all, provided it conveys who you are (people are understandably less inclined to financially support empty rectangles, logos, or recycled album covers). You can add your image from computer, or use the Artist App to add one from your phone. Take some time to get a great image.
You also need to take some time to write a concise bio to quickly convey a bit about who you are NOTE: anything beyond 400 characters will be truncated, so make sure you’re within that count. If you’re rubbish at writing (or rubbish at writing about yourself) enlist the help of someone that isn’t – preferable somebody who knows you and your music. There’s a separate section to add links to your other sites and social pages, which you can edit from your profile.
All done? Okay. Now all you have to do is unleash some music.
YouTube
The lowdown: A staggering one billion+ people visit YouTube every single month—that’s a lot of potential fans of your music. Operating your own artist channel can expose your music to this global audience. Whilst the basic template for music artist and band pages is the standard and very familiar ‘YouTube look’, there are still things you can do make it your own. Putting some thought into its configuration can help viewers understand who you are and what kind of music you make. If you don’t have a channel yet, click here to get going after absorbing the tips below.
The first thing you have to do is name your channel. This will likely be your artist name or the name of your band, unless your channel will be doing something other than showcasing your latest music and accompanying videos; a touring or studio vlog, for example.
The banner image across the top of your channel should align with your band or artist brand and can be used to promote anything from forthcoming live shows to upcoming releases and merchandise. You’ll need to adhere to file sizes and guidelines but other than that, your banner is yours to use as you wish. Along with your banner you’ll need to come up with a great channel icon for your artist page. It’s important as it is the symbol that visually represents your channel across YouTube. Make it recognisable and ‘on brand’ (yuck).
All channel’s, whether you’re a band or one of those people who make videos of taking things out of boxes (hey, each to their own), get a channel trailer video that sits prominently at the top of your channel’s home page. You can either put something unique up or, as many do, your most recent release or most popular video (though if you’ve just set up the page, video popularity will not yet factor).
To update your artist bio, select anywhere in the Biography box and copy and paste in your carefully written (and spellchecked) blurb. You need to keep it under 1,500 characters and be aware that after around 150 characters, YouTube Music truncates and puts the remaining bio behind a “More” link. Remember to follow the community guidelines for your bio!
One last thing: if you’re anticipating wanting to segment your channel into music videos, live performances, studio diaries or ASMR videos, you can do this simply enough as and when you want to do it.
SoundCloud
The lowdown: Soundcloud is a major platform for underground artists looking to put their music out for free to get an initial reaction. The basic site costs nothing and allows artists all over the world to upload their work, network with other musicians, and grow an audience. It’s also very ‘blogger friendly’, allowing tastemaker websites so easily host your tracks reach even more ears.
Creating a SoundCloud account is incredibly simple. There’s not much you can do in terms of design, so that’s one thing you don’t need to spend thinking time on (more time to perfect your sounds before slinging them up into the cloud). Simply enter an email and password, or sign in through Google or your Facebook Page. Either is fine. Once you’re in, you can edit your profile via a pop-up window. Insert all the necessary links to your social channels and website, along with your bio, a decent profile photo (as high quality as you can muster), and a header image. If you have any upcoming releases or tour dates, incorporate these into your banner-style header image. And that’s pretty much it! You’re ready to go forth and upload your music. But what to upload? And perhaps more crucially, what not to upload? Well, that needs a whole other blog post to cover properly….
Spotify
The lowdown: in case you’ve been living under a Hard Rock Café for the last 15 years, Spotify is a digital music streaming service that gives subscribers access to millions of songs, podcasts and now videos from artists all over the planet. Your artist profile is basically your homepage on Spotify. It’s where all your music lives. It’s also where fans can discover more about what’s happening with you—hear your newest releases, dig deeper with one of your playlists, find out where you’re gigging, even buy your shiny merch.
Spotify for Artists lets you (or your team, if you’re lucky enough to be signed and have amarketing machine to do the heavy lifting; all recoupable, of course) manage your artist profile, update your images, include a bio, feature your own artist playlist, and make an Artist Pick (basically select the track that you think is most likely to enamour you to passing listeners).
There are various entities that can claim access to your artist page on Spotify. Labels, distributors, managers, agents – they can then grant you yourself access as the artist. But if you’re going in to get access yourself, you’ll firstly have to sign in to or set up a Spotify account and secondly prove that you are who you say you are (the artist). This currently means proving you have access to your corresponding social channels or official website. So if you’ve been eschewing social media, it’s gonna be difficult for you to gain access to your artist page this way.
If you’re signed to a label or distributor that is already set up as a Spotify ‘label team’ and can prove their affiliation to you as an artist, they can verify you to administer your artist page. You just need to ask them for an invite (like having to ask for an invite to your own damn party!).
Whether you like the business model or not, Spotify has become an absolutely huge force within music, so the same consideration needs to go into photos, featured tracks and bio as for the other platforms. In fact, it’s probably more crucial than most to get a really good image and pack the bio with all the important info you want to relay about yourself and your music. Here’s a video guide for updating your bio if you’re tired of reading.
NOTE: The bio you add using Spotify for Artists officially replaces the Rovi bio on your profile (if you have one) and you won’t be able to revert back to it. You have 1,500 characters to tell fans who you are. You can use @ tags to link to other Spotify content such as albums that inspired you (or that you wish had never been written), artists you’ve collaborated with (who perhaps owe you royalties), or playlists you’re featured on.
Apple Music
The lowdown: Like Spotify, Apple Music is a subscription-based music streaming service, offering access to 60 million+ songs plus any songs you’ve ripped from CD (anyone remember CDs?). Content can be streamed or downloaded for offline play, and there are also song and genre-based radio stations available along with the curated Beats 1 radio station. As per Spotify, artists and artist managers can request access to Apple Music for Artists by claiming their page, though label representatives will need to go through the artist or their management to gain access.
To claim your page, you’ll first need to verify your identity. The more information you can provide the better, and applications can be fast-tracked by verification of your artist social media and distributor accounts. In the Notes section of your application you should include additional information such as your artist website.
Artists and artist managers with Administrator access are responsible for reviewing additional access requests from “responsible label representatives and others”. They can request access via the website. You can claim your artist page from either the Apple Music for Artists iOS app or the Apple Music for Artists website. NOTE:
Whether you’re going in through the iOS App or the website (artists.apple.com.), sign in with your Apple ID, which if you don’t have, you can create one at appleid.apple.com). To ensure you claim the correct artist page, copy and paste your iTunes Store artist page link to the artist search field, but you can also just search your artist name. You’ll then need to select one of your albums to double-check you’re claiming the right page. Next, choose your role, and fill out all the application fields with the aforementioned info and links to your other artist accounts.
You shall then have to wait for your application to be reviewed (you’ll see a “Pending” status when logged in). If they need more info to approve your artist claim, you’ll receive an email.
Google Music
RIP!
Share
Get the latest music news, tips and advice delivered to your inbox
Bandtheme - The Professional WordPress Theme for Bands & Musicians
Created by a team of music industry experts for bands, musicians, DJ’s, producers and record labels to create a professional music website.
Whilst social and streaming sites are an integral part of a band or musician’s online presence, there are many benefits to also having a dedicated artist or band website. We discuss them all here.
Having a kick ass website is all well and good, but if nobody visits it, finds it, or knows about it, you may as well have left it unpublished. Here we outline how to drum up traffic.
To provide the best experiences, we use technologies like cookies to store and/or access device information. Consenting to these technologies will allow us to process data such as browsing behaviour or unique IDs on this site. Not consenting or withdrawing consent, may adversely affect certain features and functions.
Functional
Always active
The technical storage or access is strictly necessary for the legitimate purpose of enabling the use of a specific service explicitly requested by the subscriber or user, or for the sole purpose of carrying out the transmission of a communication over an electronic communications network.
Preferences
The technical storage or access is necessary for the legitimate purpose of storing preferences that are not requested by the subscriber or user.
Statistics
The technical storage or access that is used exclusively for statistical purposes.The technical storage or access that is used exclusively for anonymous statistical purposes. Without a subpoena, voluntary compliance on the part of your Internet Service Provider, or additional records from a third party, information stored or retrieved for this purpose alone cannot usually be used to identify you.
Marketing
The technical storage or access is required to create user profiles to send advertising, or to track the user on a website or across several websites for similar marketing purposes.